A panicked client once called me after trying to mount a 75-inch flat-screen TV in his living room. He had used the old “knuckle-knock” method—tapping on the drywall and listening for a solid thud. He felt confident right up until the moment he drove a three-inch lag screw into what he thought was a wooden stud, only to puncture a live PVC drain pipe buried directly behind the drywall.
Within minutes, water was cascading inside his wall, ruining $4,000 worth of hardwood flooring.
That disaster could have been completely avoided with a $40 tool and sixty seconds of proper calibration. Over my 10+ years as a home improvement specialist, I’ve learned that guessing what lies behind a sheet of drywall is a high-stakes gamble. Mastering the use of a digital stud finder isn’t just about hanging pictures straight—it is a critical safety protocol that prevents catastrophic structural, electrical, and plumbing errors.
How It Works: The Science Behind Wall Scanners
Many homeowners assume that stud detectors act like magnets pulling toward hidden iron nails. While basic magnetic finders exist, a modern digital stud finder operates on a completely different physical principle: dielectric constant capacitance sensing.
Think of your wall like a multi-layered cake. Drywall has a specific density and dielectric constant (its ability to store electrical energy in an electrostatic field). Air pockets behind the drywall have another. Solid wood or metal framing studs have a significantly higher density.
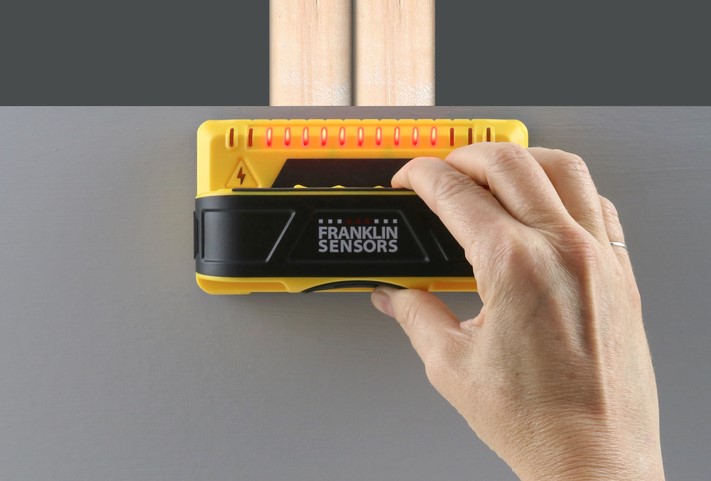
When you slide a digital capacitive scanner across a wall, its sensor plate emits a low-voltage electrostatic field. As the sensor moves from an empty stud bay over a solid 2×4 framing member, the change in material density alters the electrostatic capacitance. The device’s onboard microprocessor calculates this shift in milliseconds, signaling the precise edge or center of the stud via LED displays and audible beeps.
+--------------------------+-----------------------+-----------------------+-------------------------+
| Sensor Technology Type   | Material Detection    | Accuracy Through Drywall| AC Wire Detection    |
+--------------------------+-----------------------+-----------------------+-------------------------+
| Magnetic (Rare Earth)    | Ferrous Fasteners     | Low to Moderate       | None                    |
| Edge Capacitance         | Wood & Metal Edges    | Moderate              | Basic (Single Pole)     |
| Center-Finding Capacitance| Wood/Metal Center    | High                  | Advanced (Live AC)      |
| Radar / Ultra-Wideband   | Wood, Pipe, Wire, Pest| Maximum (Multi-Depth) | Exceptional (Deep/Live) |
+--------------------------+-----------------------+-----------------------+-------------------------+
Decoding Sensor Modes: Edge-Finding vs. Center-Finding
Not all digital scanners process signals the same way. Knowing which mode your tool uses makes the difference between driving a screw into solid lumber or missing it entirely.
Edge-Finding Scanners
Basic digital models locate the outer boundaries of a stud. They signal when the sensor crosses from empty space onto the outer edge of a framing member. To find the centerline using an edge-finder, you must scan from the left, mark the edge, scan from the right, mark the opposite edge, and calculate the exact midpoint (typically 1.5 inches wide for standard dimensional lumber).
Center-Finding Scanners
Advanced multi-sensor models utilize dual capacitive plates to calculate density gradients simultaneously. They track both edges at once and pinpoint the exact geometrical center of the stud on a single pass, drastically reducing user error and saving valuable time on the jobsite.
Navigating Complex Wall Construction: Plaster, Lathes, and Double-Rock
A common point of frustration for DIYers is getting false positive readings on older homes or complex wall builds.
-
Standard Drywall (1/2″ to 5/8″): Standard scan modes work flawlessly.
-
Double Drywall / Fire Walls (1.25″+): Standard capacitance struggles to penetrate thick layers. Switch your tool to Deep Scan Mode, which increases the electrostatic field depth to penetrate up to 1.5 inches.
-
Lath and Plaster Walls: Traditional capacitive scanners fail on lath and plaster because the wood lath strips running horizontally create constant density changes. For historic plaster homes, use an ultra-wideband radar scanner or a high-strength neodymium magnetic stud locator to find the vertical columns of cut nails.
Step-by-Step Scan Protocol for Flawless Accuracy
Using a digital stud finder seems simple, but improper handling causes 90% of false readings. Follow this systematic approach for consistent, accurate results every time.
Expert Advice: Pro Tips and Hidden Traps
⚠️ Static Electricity Hazards
Sliding a plastic tool across painted drywall creates static electricity charges that blind capacitive sensors, causing erratic “ghosting” or false positive readings. To discharge static electricity, place your free hand flat against the wall roughly 12 inches away from the scanner while operating the tool. Your body acts as a ground wire, clearing the signal!
Detecting Live Electrical Wiring
The most valuable feature built into modern digital stud finder units is live AC wire detection. Internal sensors detect the electromagnetic field emitted by live 110V/220V electrical lines.
-
If your tool’s AC warning icon flashes or sounds an alarm, STOP DRILLING IMMEDIATELY.
-
Remember: Shielded wires, wires enclosed in metal conduit, or unpowered wires (switched off at the breaker) will not emit a detectable AC field! Always treat every wall cavity with caution.
💡 Pro Tip from the Field
Want to double-check a stud location without punching test holes? Look closely at your baseboard trim. Carpenters almost always nail baseboard trim directly into wall studs. Locate the filled nail dimples along the bottom trim board, and draw a vertical plumb line up the wall—it will align directly with the center reading on your digital scanner!
Master Your Wall Scans with Confidence
A reliable digital stud finder is an essential diagnostic instrument for any home improvement toolkit. By understanding capacitive sensing, calibrating your device properly, and cross-checking layout patterns, you eliminate costly guesswork, protect hidden home infrastructure, and ensure every heavy wall fixture is anchored securely for years to come.
What tools or methods do you currently rely on when locating wall studs? Have you ever encountered frustrating “ghost” readings or hidden pipes during a home project? Leave a comment below with your questions or share your favorite wall-scanning tricks—I’d love to join the conversation and offer custom advice!