Picture mid-July: temperatures soaring past 90°F (32°C), weeks without a drop of rain, and your neighbor’s lawn turning into a crispy, bleached-brown straw field. Yet, right across the fence, another yard remains thick, deep green, and resilient against the oppressive heat.
The secret isn’t throwing endless gallons of water or harsh synthetic chemicals at the turf.
Over my decade of hands-on experience as a home improvement and landscape manager, I’ve seen countless homeowners throw away thousands of dollars treating cool-season grasses like tropical plants. True mastery of Fescue lawn care boils down to working with the plant’s natural biological mechanics rather than fighting them—delivering a lush, sustainable lawn that thrives on minimal inputs.
Understanding the Fescue Advantage and The Root Mechanics
Fescue varieties—particularly Turf-Type Tall Fescue (TTTF) and Fine Fescues—are the unsung workhorses of cool-season turf. Unlike warm-season grasses such as Bermuda or Zoysia, which spread aggressively via above-ground stolons and underground rhizomes, most Fescues are bunch-forming grasses.
Think of a Fescue plant like a bundle of deep-rooted drinking straws. While standard Kentucky Bluegrass roots hover near the top 2 to 3 inches of topsoil, a mature Tall Fescue root system can drill down 2 to 3 feet deep in search of subsoil moisture and nutrients.
When you understand this fundamental architectural difference, your entire approach to irrigation, mowing, and fertilization shifts completely.
Sustainable Watering Protocols: Deep and Infrequent
The biggest mistake I see DIYers make is giving their lawn a quick 10-minute sprinkle every evening. Frequent, light watering encourages shallow root systems, turning your turf into a hydro-dependent plant that panics at the first sign of summer heat.
The 1-Inch Deep-Soak Rule
To cultivate deep roots, apply 1 inch of water per week, split into just two sessions of 0,5 inches each (or a single 1-inch soak during moderate weather).
Timing Matters: Always irrigate between 4:00 AM and 8:00 AM. Watering early minimizes evaporative loss from heat and wind while preventing water from sitting on leaf blades overnight, which breeds fungal pathogens like brown patch (Rhizoctonia solani).
Audit Your Sprinklers: Place small flat-bottomed cans or tuna tins across your lawn to measure how long your system takes to deliver half an inch of water.
Pro Tip: If water starts running off into the street before your target depth is reached, use a cycle-and-soak method. Run your sprinklers for 15 minutes, pause for 30 minutes to let the soil absorb the moisture, and then run them for the remaining 15 minutes.
High-Cut Mowing Tactics for Sustainable Health
If you want to reduce weeds and watering needs by half without spending a dime extra, change the cutting height on your mower deck.
Why Height is Might
Set your mower deck to maintain your Fescue at 3,5 to 4 inches high. Shading the soil surface with tall grass blades keeps soil temperatures cooler during summer months, suppressing weed seeds like crabgrass from germinating without heavy chemical herbicide applications.
Furthermore, a leaf blade is the plant’s solar panel. The more surface area you leave intact, the more sugars the plant produces to feed its deep root mass below ground.
The One-Third Rule
Never trim off more than one-third of the total leaf blade length in a single mowing session. Cutting off too much tissue shocks the plant system, forcing it to divert energy away from root development to rebuild lost leaf structure. Keep your mower blades razor-sharp; dull blades shred the tips, leaving brown, ragged edges that act as open doors for plant diseases.
Soil Nutrition and Overseas Management
Achieving sustainable Fescue lawn care means prioritizing long-term soil health over quick-fix synthetic NPK fertilizers.
1. Soil Testing as Your Roadmap
Before applying any soil amendments, run a comprehensive soil test to measure your pH levels and organic matter percentage. Fescue thrives best in slightly acidic to neutral soil with a pH ranging between 6,0 to 6,8. If your soil drops below 6,0, apply pelletized lime to unlock bound nutrients.
2. Slow-Release Nitrogen Applications
Feed your lawn primarily in the autumn months when cool-season grasses are building root energy reserves for the following year.
Autumn Focus: Apply 75% of your annual nitrogen quota between September and November using slow-release organic or synthetic fertilizers.
Spring Restraint: Go easy on heavy spring nitrogen applications; excessive flush growth in spring creates soft, tender foliage that collapses under summer heat stress and fungus pressure.
3. Annual Autumn Aeration and Overseeding
Because bunch-forming Fescues do not self-repair like spreading grasses, individual plants eventually age out or thin from heavy foot traffic.
Every autumn, perform core aeration to pull 2 to 3-inch soil plugs out of the turf, reducing compaction and creating ideal seed-to-soil contact channels. Immediately follow up with a high-quality, endophyte-enhanced Turf-Type Tall Fescue seed blend at a rate of 4 to 6 pounds per 1,000 square feet.
Avoid buying cheap seed bags labeled “Varieties Not Stated” (VNS) or those containing high percentages of Annual Ryegrass. Annual ryegrass dies off with the first summer heat spike, leaving unsightly bare patches across your yard.
Final Thoughts: Take Control of Your Turf
Building a resilient, eco-friendly lawn doesn’t mean spending endless hours pulling weeds or wasting thousands of gallons of water. By mastering fundamental Fescue lawn care principles—deep watering, high mowing, autumn overseeding, and organic soil building—you can enjoy a vibrant, lush green lawn while keeping maintenance costs low.
What does your current lawn care schedule look like? Have you struggled with heat stress or stubborn weeds during the peak summer months? Share your experiences, current grass species, or questions in the comments below!
All shapes and designs are manufactured to exacting standards. You don’t compromise on style; we never compromise on the quality or security. Our high security doors are certified and tested in German most famous Rossenheim laboratory high security doors We reinforced the walls and fitted high security doors to protect our customer and his antiques collection for an apartment in London. If you live where our engineers are not able to reach you, just guide us, and we will make and ship the door 4 you
Durable and lasting, convenient to use. All our security doors are manufactured by especially precise programmed machines Amada, which can process metal with the precision of 0.1 mm, therefore, their construction is precisely accurate and straight. security doors One of the locks installed in security doors must be no lower than 5th security class and protected by a drilling resistant manganese plate. Both locks are installed in protective steel boxes, and a separate protective sleeve secures each pin.
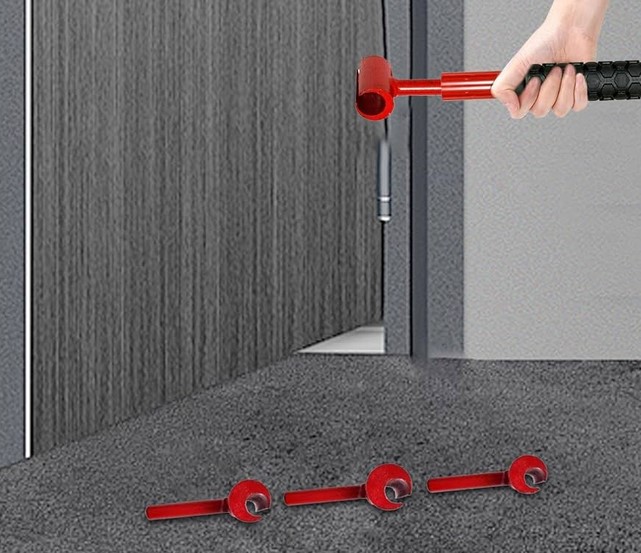
All shapes and designs are manufactured to exacting standards. You don’t compromise on style; we never compromise on the quality or security. Our high security doors are certified and tested in German most famous Rossenheim laboratory high security doors We reinforced the walls and fitted high security doors to protect our customer and his antiques collection for an apartment in London. If you live where our engineers are not able to reach you, just guide us, and we will make and ship the door 4 you
Durable and lasting, convenient to use. All our security doors are manufactured by especially precise programmed machines Amada, which can process metal with the precision of 0.1 mm, therefore, their construction is precisely accurate and straight. security doors One of the locks installed in security doors must be no lower than 5th security class and protected by a drilling resistant manganese plate. Both locks are installed in protective steel boxes, and a separate protective sleeve secures each pin.
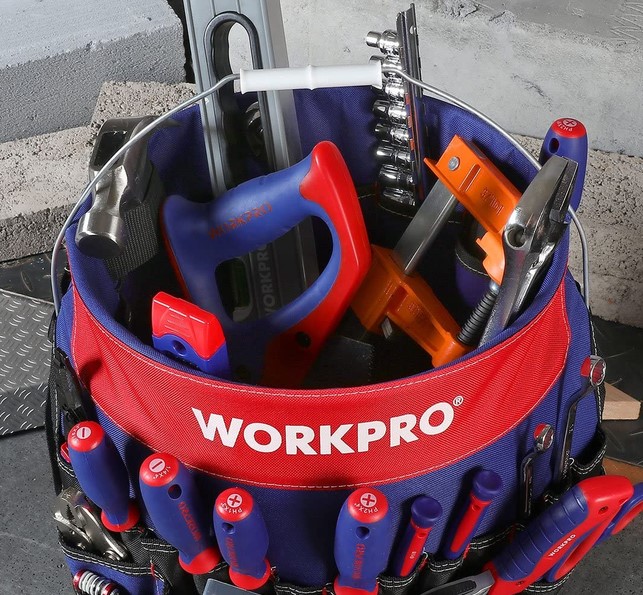
Nothing ruins the peaceful calm of a quiet morning like a sticking interior door that requires a solid shoulder-nudge to latch shut. Or worse, a sagging cabinet door that leaves an ugly 8-millimeter uneven gap along your newly renovated kitchen layout.
Most homeowners suffer through these daily annoyances or jump to extreme solutions like planing down the door edge or replacing the entire frame.
In my early days as a residential contractor, I made the exact same mistake. I once spent two full hours shimming, unscrewing, and physically wrestling a heavy solid-core entry door, only to end up with stripped screw holes and an even worse reveal.
It wasn’t until a veteran carpenter handed me a specialized hinge adjustment tool—essentially a high-leverage wrench designed to calibrate heavy-duty door hinges without removing them—that I realized how simple precision hardware tuning actually is.
Why Standard DIY Methods Usually Backfire
When a heavy door sags, the natural tendency for most DIYers is to grab a screwdriver and crank down on the top hinge screws. If that fails, they usually resort to wedging plastic shims behind the leaf or shaving off wood with a hand plane.
While shimming has its place in rough carpentry, using it on sagging heavy-traffic doors often creates secondary problems. Shimming changes the reveal line unevenly and can place abnormal lateral stress on the hinge knuckles, accelerating wear on the pin. Planing wood off the latch side, on the other hand, is a irreversible action; once you remove that timber, you can never put it back when seasonal humidity changes cause the frame to shift again.
+------------------------+---------------------------------+-----------------------------------+
| Adjustment Method | Root Cause Addressed? | Risk Level / Permanent Damage |
+------------------------+---------------------------------+-----------------------------------+
| Tightening Screws | Only if screws are loose | High risk of stripping screw hole |
| Cardboard/Plastic Shim | Masks sagging temporarily | Distorts hinge plane and pin fit |
| Shaving Wood Edge | No (Destructive workaround) | High (Irreversible modification) |
| Hinge Adjustment Tool | Yes (Direct knuckle alignment) | Zero (Preserves original frame) |
+------------------------+---------------------------------+-----------------------------------+
Using a dedicated bender gives you surgical control over the mechanical geometry of the hinge assembly itself. You fix the true cause of the sag—bent metal knuckles under load—rather than treating the symptoms by destroying your woodwork.
The Mechanics Behind the Hinge Adjustment Tool
To understand why this tool works so effectively, you need to understand how heavy architectural door hinges behave over time under continuous force.
The Physics of Hinge Sag
A standard residential or commercial door acts like a cantilevered beam. Gravity constantly pulls the top corner of the door away from the jamb while pushing the bottom corner into the frame. Over thousands of open-close cycles, this leverage subtly widens the gap between the barrel knuckles of the top hinge leaf, causing the latch corner of the door to drop.
How Lever-Action Calibration Works
A specialty hinge adjustment tool consists of a heavy-gauge steel bar with a precision-milled slot designed to slip directly over the individual knuckles of a hinge leaf.
By applying controlled, micro-leveraged pressure, you bend the top hinge knuckles back toward the jamb by fractions of a millimeter. Think of it like tuning a piano string: small, calculated adjustments alter the tension and alignment of the entire door system without disturbing the surrounding structure.
Step-by-Step Guide: How to Micro-Adjust Sagging Doors
Re-aligning a sagging or sticking door with a long-handled adjustment wrench takes less than five minutes once you know the step-by-step procedure.
Step 1: Diagnose the Reveal Gaps
Close the door and inspect the gap between the door edge and the frame (known as the “reveal”).
If the gap at the top latch corner is tight or rubbing, your top hinge has stretched outward.
If the bottom edge scrapes against the threshold, the entire door assembly requires subtle upward leverage at the top leaf.
Step 2: Select the Correct Tool Size
Hinge knuckles come in standard industrial gauges. Measure your hinge thickness and pin diameter before purchasing or selecting your tool head.
Standard Residential: Fits smaller 3,5-inch to 4-inch hinges with lighter pin gauges.
Commercial Heavy-Duty: Designed for 4,5-inch to 5-inch heavy-gauge ball-bearing hinges found on solid wood or metal doors.
Step 3: Apply Controlled Pressure
Open the door to a 45-degree angle to relieve binding tension on the latch. Slide the slotted head of your hinge adjustment tool completely over the topmost knuckle of the top hinge leaf.
Smoothly pull the tool handle toward the door jamb in small, deliberate increments. Apply firm, gradual pressure—never yank or bounce on the lever.
Pro Tip: Always adjust one knuckle at a time, working your way down the top hinge leaf. Check the door clearance after every single movement. A shift of just 1 to 2 millimeters at the hinge barrel translates to nearly 5 to 10 millimeters of lift at the outer latch edge!
Step 4: Verify the Sweep and Latch Action
Close the door gently and observe the reveal lines along all four sides. The gap should be perfectly uniform (roughly 2,5 to 3 millimeters), and the latch bolt should slip smoothly into the strike plate without friction.
Essential Safety Protocols and Advanced Field Tips
Working with heavy leverage tools requires care to prevent damaging hardware or hurting your hands.
Support the Door Weight: For solid-core or metal commercial doors, place a wooden wedge or air-bag shim beneath the bottom outer corner while making adjustments. This prevents sudden shock-loads on the middle hinge leaf.
Inspect the Fasteners First: Before bending any metal knuckles, ensure the hinge leaf screws driven into the wooden jamb are tight and secure. Bending a hinge while screw threads are loose will strip the screw holes out completely.
Watch Out for Cast Iron Hardware: Only use adjustment tools on forged steel, brass, or heavy-duty architectural hinges. Decorative budget hinges made of cast zinc or low-grade die-cast metal can snap under heavy lateral torque.
Never use a standard adjustable pipe wrench or pliers as a substitute for a genuine slotted hinge bender. Pliers lack the broad surface contact area needed to spread leverage evenly, meaning you will crush or distort the round profile of the hinge barrel, seizing the hinge pin inside permanently.
Final Thoughts: Master the Art of Precision Hardware
Home improvement isn’t always about massive teardowns and loud power tools. More often than not, true craftsmanship comes down to mastering subtle hardware adjustments that keep your living spaces operating silently and effortlessly.
Equipping your toolkit with a dedicated hinge adjustment tool takes the guesswork out of door maintenance, saving you hours of frustrating labor and protecting your timber frames from unnecessary damage.
Have you ever struggled with a sticking door or uneven cabinet reveal in your house? What tricks have you tried in the past to get things closing smoothly again? Share your experiences, questions, or favorite hardware tips in the comments below!
Picture this: You’re halfway through replacing a kitchen faucet, lying on your back with your head shoved into a dark undersink cabinet. You reach out for your 10-inch adjustable wrench, only to realize you left it on the workbench in the garage. You crawl out, walk to the garage, grab the wrench, head back, and settle back under the sink. Five minutes later, you realize you need the thread seal tape and a flashlight. Sound familiar?
During my first couple of years managing residential renovations, I estimated that my crew lost nearly 45 minutes every single day per person just walking back and forth to retrieve forgotten tools. That wasn’t just wasted motion—it was drained energy and lost revenue.
The turning point in our workflow wasn’t a multi-thousand-dollar modular rolling stack. It was a humble 5-gallon plastic bucket fitted with a specialized sleeve. Transforming a standard utility bucket with a high-durability bucket tool organizer remains one of the most cost-effective, high-impact upgrades any DIYer or budding contractor can make.
Why Big Rigid Toolboxes Fail Small Jobs
Most beginners make the mistake of buying a massive, rigid plastic or metal toolbox as their primary mobile storage unit. While heavy hard-cases have their place for long-term shop storage or transporting heavy-duty power tools, they quickly become an obstacle on fast-paced job sites.
A traditional toolbox acts like a deep dark abyss. Small items—wire strippers, utility knives, drill bits, fasteners—naturally migrate to the very bottom, buried under heavier tools like hammers and pipe wrenches. Every time you need something small, you have to dig around like you’re searching through a lucky dip.
+------------------------+--------------------------+------------------------------+
| Logistics Feature | Traditional Rigid Box | Bucket Tool Organizer |
+------------------------+--------------------------+------------------------------+
| Visual Identification | Poor (Requires digging) | High (360° perimeter view) |
| Center Storage Area | Obstructed by trays | Wide open (Bulk/Power tools) |
| Vertical Real Estate | Horizontal bias | Maximized vertical pockets |
| Debris / Site Roughness| Can crack/rust | Indestructible HDPE shell |
+------------------------+--------------------------+------------------------------+
Using a bucket organizer is like turning your toolbox inside out. It places every hand tool on full visual display around the outer and inner perimeter, leaving the core wide open for heavy gear or job materials.
The Ergonomics and Mechanics of the Bucket Setup
Not all bucket organizers are constructed to withstand the rigors of home improvement projects. Over the last decade, I’ve put dozens of different sleeves through their paces. Here is what separates professional-grade gear from flimsy budget options.
1. Fabric Denier and Tear Resistance
Look for organizer sleeves manufactured from heavy-duty synthetic fabrics, ideally 600D to 1680D (Denier) Ballistic Polyester. Lower-grade materials will quickly puncture when loaded with sharp chisels, screwdrivers, or drywall knives. A rubberized or double-stitched rim band prevents sagging when all pockets are fully loaded.
2. Inner vs. Outer Pocket Distribution
A well-engineered sleeve strikes a balance between interior and exterior storage options:
Exterior Pockets: Ideal for frequently accessed hand tools like pliers, drivers, tape measures, and markers.
Interior Pockets: Designed to hold slender precision items, drill bit cases, or tools you want to shield from ambient job site dust and moisture.
3. Center Core Capacity
The real magic of the setup lies in the untouched central void of the 5-gallon container. While the perimeter pockets handle 30+ individual hand tools, the center core can comfortably hold larger items:
Cordless compact drills and impact drivers
Boxes of screws, anchors, or pipe fittings
Safety gear, work gloves, and knee pads
Extension cords or small paint cans
How to Set Up Your Bucket Tool Organizer for Peak Workflow
Organization is only effective if it matches your natural workflow. Here is the layout strategy I teach all new apprentices to maximize efficiency.
Phase 1: Heavy Equipment in the Base
Place your densest, lowest-frequency tools at the bottom of the open interior bucket void. This includes items like your framing hammer, small sledge, or cordless circular saw. Keeping the heaviest mass near the base Lowers the center of gravity, preventing the bucket from tipping over during transit.
Phase 2: Category Grouping Around the Rim
Group your tools by discipline around the perimeter pockets rather than scattering them randomly:
The Measuring Zone: Keep your tape measure, speed square, torpedo level, and carpenter pencils clustered together on one side.
The Fastening Zone: Group your multi-bit screwdrivers, nut drivers, and hex keys side by side.
The Cutting/Prying Zone: Slot your utility knife, wood chisels, pry bars, and aviation snips into adjacent vertical sleeves.
Pro Tip: Reserve the heavy metal belt clip on the front of your bucket tool organizer exclusively for your primary tape measure. Having a designated, muscle-memory spot for your tape saves up to dozens of micro-delays throughout your working day.
Phase 3: The Bulk Material Dump
Use the open center space above your heavy base tools to hold project-specific materials. If you’re doing electrical work, drop your wire nuts, junction boxes, and Romex spools into the center core. If you’re patching drywall, keep your joint compound tub and sanding blocks centered inside.
Maintenance and Field Insights: Protecting Your Gear
Even the toughest setup requires basic maintenance to ensure it serves you reliably for years to come.
Keep It Dry: Standard fabric bucket wraps can hold moisture if left out in the rain or set on wet mud. Always wipe down the bottom outer skirt after working outdoors.
Avoid Over-Cramming: Avoid wedging two wide-handled pliers into a single pocket meant for one. This stretches the elastic webbing, causing your tools to slip out when carrying the bucket up ladder runs or stairs.
Periodic Cleanout: Turn the bucket upside down and slap the bottom once a month. Sawdust, plaster debris, and loose screws accumulate in the bottom of fabric pockets, acting like sandpaper on your tool handles over time.
Avoid buying cheap bucket organizers that lack an open bottom cut-out inside the main sleeve. If moisture gets trapped between the fabric liner and the inner wall of the plastic bucket, it will create a humid microclimate that can rust high-carbon steel tool heads in under 48 hours.
Final Thoughts: Upgrade Your Workflow Today
Streamlining your project workflow doesn’t require complex storage systems or massive budgets. By deploying a well-structured bucket tool organizer, you eliminate constant trips across the job site, keep your essential hand tools within arm’s reach, and bring professional-grade efficiency to every room in your house.
How do you currently haul your equipment around during weekend projects? Do you use a traditional toolbox, a open tote, or have you already embraced the 5-gallon bucket system? Drop your thoughts, custom setups, or questions in the comments below!
You’ve spent hours mowing the lawn, double-checking your height settings, and cleaning off the deck. The grass looks lush, green, and healthy. Yet, as you step back on your patio with a cold drink to admire your hard work, something feels off. The edges along your flower beds look ragged, and stray blades are creeping onto your pristine concrete walkway.
That single detail ruins the entire polished look of your landscape.
Over my ten years in the home improvement and landscaping industry, I’ve seen homeowners invest thousands of dollars in high-end mowers, only to overlook the one tool that delivers that crisp, professional golf-course finish: a quality pair of grass shears long enough to save your back while providing surgical precision.
Why Mechanical Precision Beats String Trimmers Every Time
Many DIYers default to a gas or battery-powered string trimmer for edging. While trimmers are great for clearing large areas quickly, they are essentially blunt-force instruments.
Using a string trimmer along delicate garden borders is like trying to do fine calligraphy with a broad-tip marker. The high-speed line tears the grass blades rather than cutting them cleanly, leaving brown, frayed tips that invite turf disease. Furthermore, one slight slip of the hand can strip the bark off your favorite shrubs or slice right through your expensive drip irrigation line.
+------------------+-----------------------+------------------------+
| Feature | String Trimmers | Long-Handled Shears |
+------------------+-----------------------+------------------------+
| Precision | Low (Whip action) | High (Clean scissor) |
| Plant Safety | High risk of damage | Absolute control |
| Turf Health | Tears blade tips | Clean, crisp cut |
| Noise / Emissions| High noise & fumes | Zero noise & eco-friendly|
+------------------+-----------------------+------------------------+
Switching to long-handled grass shears gives you absolute control over every single cut. Think of your lawn mower as the tailor’s bolt of cloth, while your long shears act as the precision scissors crafting the bespoke suit.
The Anatomy of Superior Grass Shears Long-Handled Models
Not all manual edging tools are created equal. When selecting grass shears long handle variations, you need to understand the mechanical features that separate professional-grade tools from cheap hardware store impulse buys.
1. High-Carbon Steel Blades with Non-Stick Coating
The heart of any shearing tool is its steel. Look for blades crafted from high-carbon steel, which hold an edge significantly longer than standard stainless steel. A Teflon or friction-reducing coating is equally vital; it prevents sap, moisture, and debris from clogging the cutting mechanism during extended use.
2. Ergonomic Shaft Length and Angle Adjustment
The primary reason homeowners avoid manual shears is the fear of lower back strain. A true long-handled shear should allow you to stand completely upright with a neutral spine posture.
Pro Tip: Look for models featuring a 90-degree swiveling blade head. This allows you to alternate between horizontal trimming (flat along the lawn plane) and vertical edging (along pavement or deep garden bed borders) without twisting your wrists or contorting your back.
3. Tensioning Systems and Compound Lever Mechanisms
Cheaper tools rely on a simple center bolt that loosens over time, causing the blades to separate and fold the grass instead of cutting it. Professional tools feature spring-loaded tensioning dials and compound lever joints. This design multiplies your squeezing force, allowing you to slice through dense turf grass species like Zoysia or St. Augustine with minimal hand fatigue.
Step-by-Step Guide: Master the Vertical Clean-Cut Technique
Getting that sharp razor edge along your walkways requires proper technique. Here is the exact workflow our crew uses to achieve clean borders every time.
Step 1: Establish Your Cut Line
Before making your first snip, inspect the border. If your lawn has overgrown the hardscape significantly, use a manual step-edger or spade to cut back the thick root mass first. Your shears are designed to maintain and perfect the edge, not excavate buried concrete.
Step 2: Set the Blade Orientation
Adjust your grass shears long handle mechanism so the blades run vertically—perpendicular to the ground. The bottom stationary blade should lightly graze the concrete edge or sit just inside the garden bed trench.
Step 3: Maintain the “Staggered Stride” Stance
Stand upright with your feet shoulder-width apart, keeping your lead foot parallel to the pavement edge.
Keep your elbows tucked close to your torso.
Use your core muscles, not just your arms, to steady the tool.
Walk backward smoothly as you cut, which gives you a clear view of the freshly cut line ahead.
Step 4: The Clean-Up Sweep
Never leave your clippings sitting in the trench or scattered on the sidewalk. Use a stiff-bristle outdoor broom or a quick pass with a leaf blower to clear the debris. Leaving cut grass on concrete leads to unsightly staining when wet.
Maintenance and Care: Keeping Your Blades Razor Sharp
Even the finest tools will dull over time if neglected. A 5-minute maintenance routine after every use will double the lifespan of your equipment.
Clean Immediately: Wipe down the blades with a microfiber cloth damp with mineral spirits to dissolve sticky grass sap.
Inspect the Tension: Ensure the center spring tension nut is snug. If the blades cross loosely, tighten the nut a quarter turn at a time.
Inhibit Rust: Spray a light coat of WD-40 or apply a drop of 3-in-1 machine oil along the pivot point and blade edges before hanging the tool in your shed.
Sharpen Seasonally: Use a fine-grit diamond file following the factory bevel angle (usually around 20 to 25 degrees). Never file the flat back side of the blade!
Storing your long shears directly on damp concrete floors will draw moisture into the pivot joint and ruin the internal spring mechanism. Always hang your tools by their designated handle loops or mount them on a pegboard wall.
Final Thoughts: Elevate Your Lawn Care Game
Achieving a neighborhood-envy lawn isn’t about working harder; it’s about paying attention to the finishing details with the right tools in hand. Integrating a reliable pair of grass shears long enough for comfortable upright work transforms edging from a painful chore into a satisfying, precision craft.
What does your current lawn edging routine look like? Do you rely on power tools, or have you experienced the precision of manual shearing? Share your thoughts, photos, or questions in the comments below!
According to FBI property crime statistics, over 60% of residential burglaries occur right through the front or back door. Yet, walk down almost any suburban street at night, and you will see the same glaring vulnerability: a single, dim, 60-watt bulb buzzing over a porch, casting harsh shadows where intruders can easily hide.
A few years ago, I consulted for a homeowner who had fallen victim to three consecutive “porch pirate” package thefts in less than two months. She had installed a battery-powered video doorbell, but its low-angle lens suffered from severe glare whenever her porch light turned on, rendering the footage useless pixelated noise.
My solution was simple: we replaced her outdated fixture with a hardwired, high-lumen porch light camera system.
By combining floodlight illumination with high-definition optical surveillance into a single junction box, we eliminated dark blind spots and captured crystal-clear facial identification. Over my 10+ years in residential remodeling and home security integration, I’ve learned that true perimeter defense isn’t about hiding cameras—it’s about illuminating threats while capturing actionable footage.
The Dual-Defense Mechanism: Illumination Meets Optics
To understand why a porch light camera is superior to standalone battery cameras, you need to examine the physics of night vision optics and criminal psychology.
Think of a traditional security camera like a person trying to navigate a dark room with a tiny penlight. When a camera relies solely on its built-in Infrared (IR) night vision LEDs, the image appears washed-out, monochrome, and grain-heavy—making it nearly impossible to identify clothing colors, vehicle shades, or license plates.
A dual-purpose porch light fixture flips this dynamic entirely. The high-lumen floodlight floods the entry point with clean, color-accurate light. This allows the camera’s image sensor to operate in full-color night mode, capturing crucial details while simultaneously stripping away the cover of darkness that opportunistic criminals rely on.
+--------------------------+-----------------------+-----------------------+-------------------------+
| Feature / Specification | Battery Video Doorbell| Standalone IR Camera | Hardwired Porch Light Cam|
+--------------------------+-----------------------+-----------------------+-------------------------+
| Power Source | Battery / Low Voltage | DC Adapter / PoE | Line Voltage (120V AC) |
| Lighting Output | None to Minimal LED | Infrared (Monochrome) | High Lumen (1000–2500 lm)|
| Night Video Quality | Black & White / Grainy| Low-Color IR | Full-Color HD/4K |
| Active Deterrence | Chime / Audio Speaker | Basic Siren | Siren + Flashing Light |
+--------------------------+-----------------------+-----------------------+-------------------------+
Optical Dynamics: FOV, Resolution, and Sensor Placement
When selecting a porch light camera, don’t get blinded by marketing buzzwords. Focus on three core technical specifications that directly impact surveillance quality:
Field of View (FOV) and Aspect Ratio
For entryways, a wide diagonal Field of View (140° to 180°) is essential. However, pay close attention to the vertical aspect ratio. A 1:1 or 4:3 aspect ratio provides “head-to-toe” coverage, allowing you to monitor packages left directly on the doorstep below the light fixture.
Dynamic Range (HDR)
Front porches suffer from extreme lighting contrast—bright streetlights in the background and dark overhang shadows near the door. High Dynamic Range (HDR) technology balances exposure, preventing backlit subjects from turning into featureless black silhouettes.
Hardwired vs. Battery: Power Logistics That Matter
In my site visits, the number one reason homeowners give up on outdoor surveillance is battery fatigue. Cold winter temperatures can drain lithium-ion batteries in weeks, leaving your entry completely unguarded.
Replacing an existing outdoor light fixture with a hardwired porch light camera taps directly into your home’s 120V AC electrical system.
This provides a continuous, uninterrupted power supply. You get 24/7 continuous video recording (CVR), instant motion detection without power-saving wake-up delays, and powerful 2,000+ lumen LED panels that battery units simply cannot support.
Step-by-Step Installation Protocol for Electrical Safety
Upgrading your exterior fixture is a manageable DIY project, but working with line-voltage electricity requires strict safety compliance.
1.Cut Power at the Main Breaker:Safety fundamental.
Locate your main electrical panel and turn off the breaker supplying power to the porch light circuit. Use a non-contact voltage tester at the light switch to verify zero current before touching any wiring.
2.Remove Old Fixture & Inspect Box:Inspect junction box capacity.
Unscrew the existing light fixture. Ensure the junction box inside the wall is securely anchored to a wall stud and rated to support the weight of the new camera light fixture (typically 3 to 7 lbs).
3.Connect Line, Neutral, and Ground Wires:Match wire colors.
Attach the fixture’s wires to your house wiring using outdoor-rated wire nuts: Black to Black (Line/Hot), White to White (Neutral), and Green or Bare Copper to the Ground wire/screw.
4.Mount and Apply Weatherproof Sealant:Waterproofing is non-negotiable.
Bolt the fixture mounting plate tight against the junction box. Apply a continuous bead of exterior-grade 100% silicone caulk around the top and sides of the fixture base plate, leaving the bottom edge open as a weep hole for moisture drainage.
Expert Advice: Pro Tips and Hidden Pitfalls
⚠️ The “Smart Switch” Bypass
The most frustrating mistake homeowners make after installing a hardwired porch light camera is turning off the wall switch inside the house! Flipping that switch cuts power to both the light AND the camera, taking your security system offline. Install a clear wall switch guard lock over the interior switch to prevent family members or guests from accidentally powering down your perimeter defense.
Managing PIR Motion Sensitivity
False alarms caused by swaying tree branches or passing cars can ruin the utility of a smart camera.
Look for units featuring Passive Infrared (PIR) sensors paired with AI Computer Vision.
PIR detects physical body heat signatures, while AI filters distinguish between pets, vehicles, delivery drivers, and human movement—reducing notification fatigue by up to 90%.
💡 Pro Tip from the Field
Pay close attention to color temperature! Select a unit that offers adjustable LED color temperatures (2700K to 3000K Warm White). Ultra-bright 5000K Daylight LEDs look harsh and commercial on a residential porch, attracting swarms of insects that trigger constant camera motion alerts.
Harden Your Property’s Front Line
Securing your home shouldn’t force you to choose between welcoming curb appeal and robust technical security. Integrating a high-performance porch light camera into your exterior envelope delivers brilliant architectural lighting while establishing an unyielding, 24/7 surveillance anchor right at your primary entry point.
How is your front entry currently illuminated and monitored at night? Have you experienced issues with dark spots or battery camera lag on your property? Leave a comment below with your questions or share your home security setups—I’d love to help you build a safer perimeter!